Windowsの開発環境をセットアップしてみる
こんにちは。永和システムマネジメント FDPメンバの坂部です。
先日、MacからWindowsに移行しました。
今日は、私が行ったセットアップをふりかえってみようと思います。
設定したもの
- WSL
- Docker
- Git
- Homebrew
- zsh
- VS Code
ここには挙げていませんが、SlackやZoomも入れました。
WSL
まず、WSLを入れます。デフォルトではUbuntuがインストールされます。
powershell
# see https://docs.microsoft.com/ja-jp/windows/wsl/install
wsl --install

以降は、WSLで作業します。
Docker
Dockerは、WSLに入れます。
最初はDocker Desktop for Windowsを使っていたのですが、有料化するので、WSLにインストールすることにしました。
WSL
# see https://docs.docker.com/engine/install/ubuntu/

# レジストリを設定
$ sudo apt-get update
$ sudo apt-get install \
    ca-certificates \
    curl \
    gnupg \
    lsb-release

$ curl -fsSL https://download.docker.com/linux/ubuntu/gpg | sudo gpg --dearmor -o /usr/share/keyrings/docker-archive-keyring.gpg

$ echo \
  "deb [arch=$(dpkg --print-architecture) signed-by=/usr/share/keyrings/docker-archive-keyring.gpg] https://download.docker.com/linux/ubuntu \
  $(lsb_release -cs) stable" | sudo tee /etc/apt/sources.list.d/docker.list > /dev/null

# Dockerをインストール
$ sudo apt-get update
$ sudo apt-get install docker-ce docker-ce-cli containerd.io
Hello Worldしてみます。
WSL
# Dockerデーモンを起動
$ sudo service docker start
 * Starting Docker: docker

# Hello World
$ sudo docker run hello-world
Unable to find image 'hello-world:latest' locally
latest: Pulling from library/hello-world
2db29710123e: Pull complete
Digest: sha256:2498fce14358aa50ead0cc6c19990fc6ff866ce72aeb5546e1d59caac3d0d60f
Status: Downloaded newer image for hello-world:latest

Hello from Docker!
This message shows that your installation appears to be working correctly.

To generate this message, Docker took the following steps:
 1. The Docker client contacted the Docker daemon.
 2. The Docker daemon pulled the "hello-world" image from the Docker Hub.
    (amd64)
 3. The Docker daemon created a new container from that image which runs the
    executable that produces the output you are currently reading.
 4. The Docker daemon streamed that output to the Docker client, which sent it
    to your terminal.

To try something more ambitious, you can run an Ubuntu container with:
 $ docker run -it ubuntu bash

Share images, automate workflows, and more with a free Docker ID:
 https://hub.docker.com/

For more examples and ideas, visit:
 https://docs.docker.com/get-started/
問題なさそうですね。
後ほどVS Codeを使うときに問題になるので、Dockerをルートユーザ以外で扱えるようにします。
WSL
# see https://docs.docker.com/engine/install/linux-postinstall/#manage-docker-as-a-non-root-user

$ sudo groupadd docker
$ sudo usermod -aG docker $USER
WSLを再起動すると、Dockerがsudo無しで使えるようになっています。
WSL
$ docker run hello-world

Hello from Docker!
This message shows that your installation appears to be working correctly.

To generate this message, Docker took the following steps:
 1. The Docker client contacted the Docker daemon.
 2. The Docker daemon pulled the "hello-world" image from the Docker Hub.
    (amd64)
 3. The Docker daemon created a new container from that image which runs the
    executable that produces the output you are currently reading.
 4. The Docker daemon streamed that output to the Docker client, which sent it
    to your terminal.

To try something more ambitious, you can run an Ubuntu container with:
 $ docker run -it ubuntu bash

Share images, automate workflows, and more with a free Docker ID:
 https://hub.docker.com/

For more examples and ideas, visit:
 https://docs.docker.com/get-started/
Git
Gitは既にインストールされていますが、バージョンが古いので新しくします。
WSL
# Gitのバージョンを確認する
$ git --version
git version 2.17.1

# 最新のGitをインストールする
# see https://git-scm.com/download/linux
$ sudo add-apt-repository ppa:git-core/ppa
$ sudo apt update
$ sudo apt-get install git

# Gitのバージョンを確認する
$ git --version
git version 2.34.1
クレデンシャルを保存するために、Git Credential Managerを使います。
Git Credential ManagerはGit for Windowsに含まれているようなので、Git for Windowsをインストールします。

WSLに戻って、クレデンシャルマネージャを設定します。
WSL
# see https://docs.microsoft.com/ja-jp/windows/wsl/tutorials/wsl-git
$ git config --global credential.helper "/mnt/c/Program\ Files/Git/mingw64/libexec/git-core/git-credential-manager-core.exe"
Homebrew
HomebrewはMac OSでよく使われるパッケージマネージャですが、Linuxでも使えます。 これ以降は、Homebrewでインストールしていきます。
WSL
# see https://docs.brew.sh/Homebrew-on-Linux

# Homebrewをインストール
$ /bin/bash -c "$(curl -fsSL https://raw.githubusercontent.com/Homebrew/install/HEAD/install.sh)"

...略...

==> Installation successful!

==> Homebrew has enabled anonymous aggregate formulae and cask analytics.
Read the analytics documentation (and how to opt-out) here:
  https://docs.brew.sh/Analytics
No analytics data has been sent yet (nor will any be during this install run).

==> Homebrew is run entirely by unpaid volunteers. Please consider donating:
  https://github.com/Homebrew/brew#donations

==> Next steps:
- Run these two commands in your terminal to add Homebrew to your PATH:
    echo 'eval "$(/home/linuxbrew/.linuxbrew/bin/brew shellenv)"' >> /home/hirokisakabe/.profile
    eval "$(/home/linuxbrew/.linuxbrew/bin/brew shellenv)"
- Install Homebrews dependencies if you have sudo access:
    sudo apt-get install build-essential
  For more information, see:
    https://docs.brew.sh/Homebrew-on-Linux
- We recommend that you install GCC:
    brew install gcc
- Run brew help to get started
- Further documentation:
    https://docs.brew.sh
# 上記の "Next steps" を参考にパスを通す
$ echo 'eval "$(/home/linuxbrew/.linuxbrew/bin/brew shellenv)"' >> /home/hirokisakabe/.profile
$ eval "$(/home/linuxbrew/.linuxbrew/bin/brew shellenv)"

# パスが通っているか確認
$ which brew
/home/linuxbrew/.linuxbrew/bin/brew
zsh
今までMac OSでzshを使っていたので、ログインシェルをbashからzshに変更します。
WSL
# zshをインストール
$ brew install zsh

# パスを確認
$ which zsh
/home/linuxbrew/.linuxbrew/bin/zsh
ログインシェルの候補リストに、zshを追加します。
/etc/shells
# /etc/shells: valid login shells
/bin/sh
/bin/bash
/bin/rbash
/bin/dash
/usr/bin/tmux
/usr/bin/screen
# 下記を追加
/home/linuxbrew/.linuxbrew/bin/zsh
WSL
# ログインシェルを変更
$ chsh -s /home/linuxbrew/.linuxbrew/bin/zsh
WSLを再起動するとzshへの変更が反映されています。
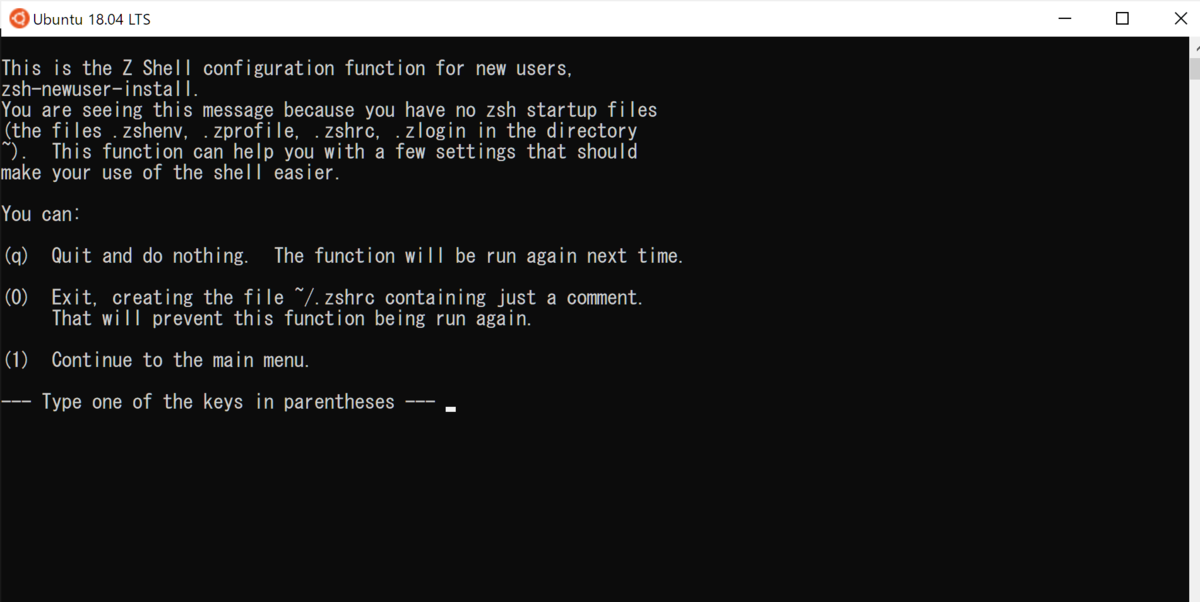
このあと少し使うので、.zshrcを作るために「0」を入力しておきます。
せっかくなので?zshのプロンプトテーマを設定してみます。
わたしは、pureをよく使ってます。
WSL
# bashに設定したHomebrewのパスを、zshにも設定する
$ echo 'eval "$(/home/linuxbrew/.linuxbrew/bin/brew shellenv)"' >> /home/hirokisakabe/.profile
$ eval "$(/home/linuxbrew/.linuxbrew/bin/brew shellenv)"

# pureをインストール
$ brew install pure
.zshrcを編集してpureを設定します。
.zshrc
# Created by newuser for 5.8

# see https://github.com/sindresorhus/pure
# 下記を追加
autoload -U promptinit; promptinit
prompt pure
WSL
# .zshrcの設定を反映
$ source .zshrc

pureが設定されました!!ちょっと見辛いかな…
VS Code
普通に公式サイトからインストールします。
FDPではVS Code Remote Containerを使っているので、問題なく動作するか、開発コンテナを立ち上げて確認してみます。
サンプルとして、 https://github.com/microsoft/vscode-remote-try-python を使います。
WSL
$ git clone https://github.com/microsoft/vscode-remote-try-python.git

$ cd vscode-remote-try-python

# カレントディレクトリでVS Codeを開く
# see https://docs.microsoft.com/ja-jp/windows/wsl/tutorials/wsl-vscode#from-the-command-line
$ code .
Reopen in Containerします。
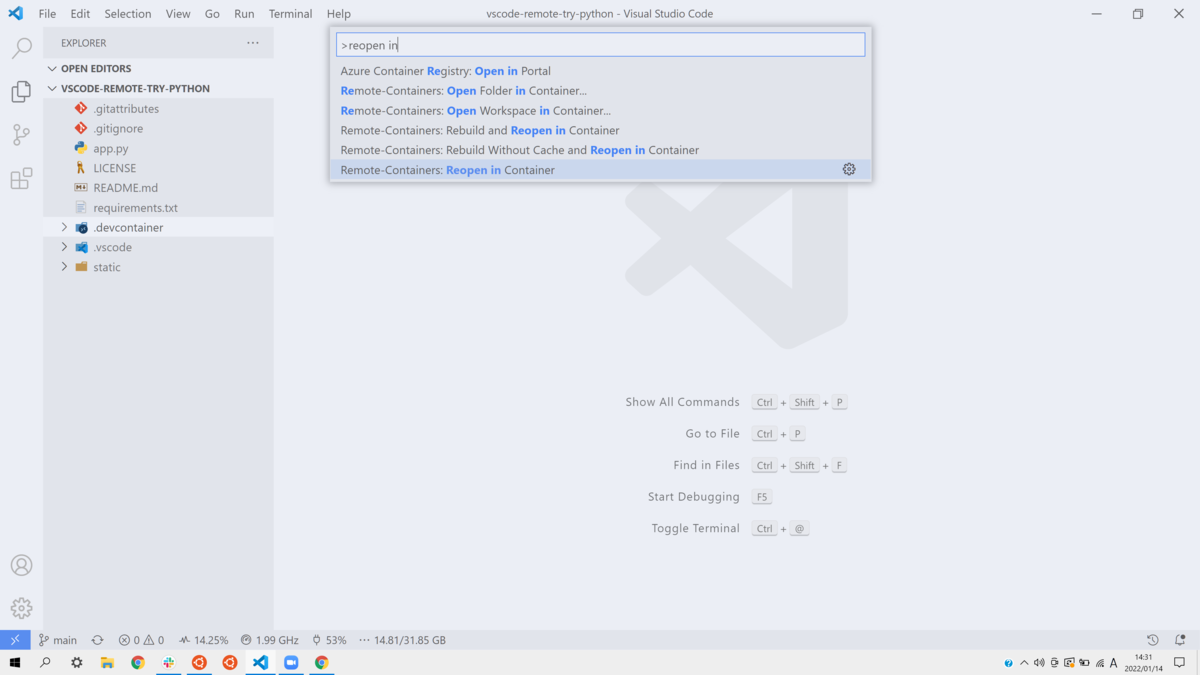
開発コンテナを立ち上げることができました!!

おわり
↓ Dockerデーモンを自動で起動するようにしたり、dotfilesをMacOS用と共通化したり、やってみたいことはまだまだあります!!